How to Remove and Replace the Focusing Lens on a VLS Desktop Laser Cutter
- Make sure the system is powered off and unplugged.
- Slide the X axis arm forward and lift the metal cover. The cover is held down by magnets.
- Locate the focus carriage (1) and loosed the thumbscrews (2) completely. They are held captive by retaining clips so they should not come out all the way.
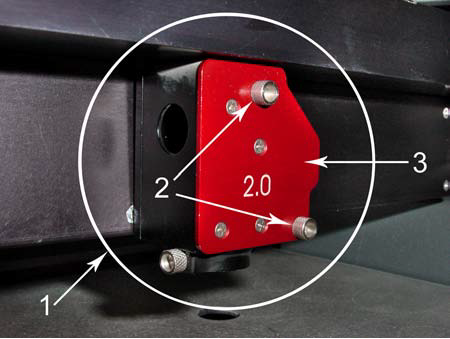
- Slide the lens cover plate (3) forward and out of the carriage to remove the optics.
- Place the optics on a soft, non-abrasive cloth
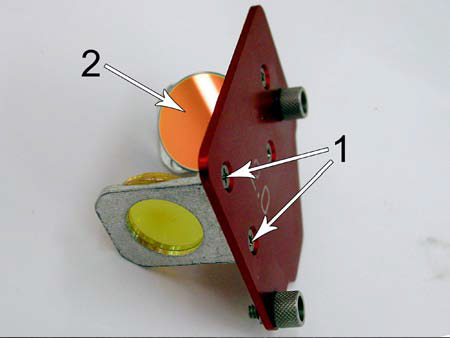
- Remove the 2 Phillips head screws (1) that attach the Focusing Lens to the front cover plate and remove the lens. Clean #3 mirror (2) if necessary.
- Reinstall the optics in the focus carriage.